

CHASSIS UPGRADES - AUDI A5 3.0 TDI PROJECT
Part 2 of our 3.0 TDI Audi A5 project car vlog.
Hopefully the sound is a little better the last video but we still didn't have our external mic during recording, so apologies for the poor quality!
This time we talk about what modifications we will be performing to the chassis and brakes before upgrading the power.
A lot of people overlook this, even on everyday road cars that are not destined for the track. We always recommend that you make sure the Brakes and Suspension are up to the job before increasing the power output.
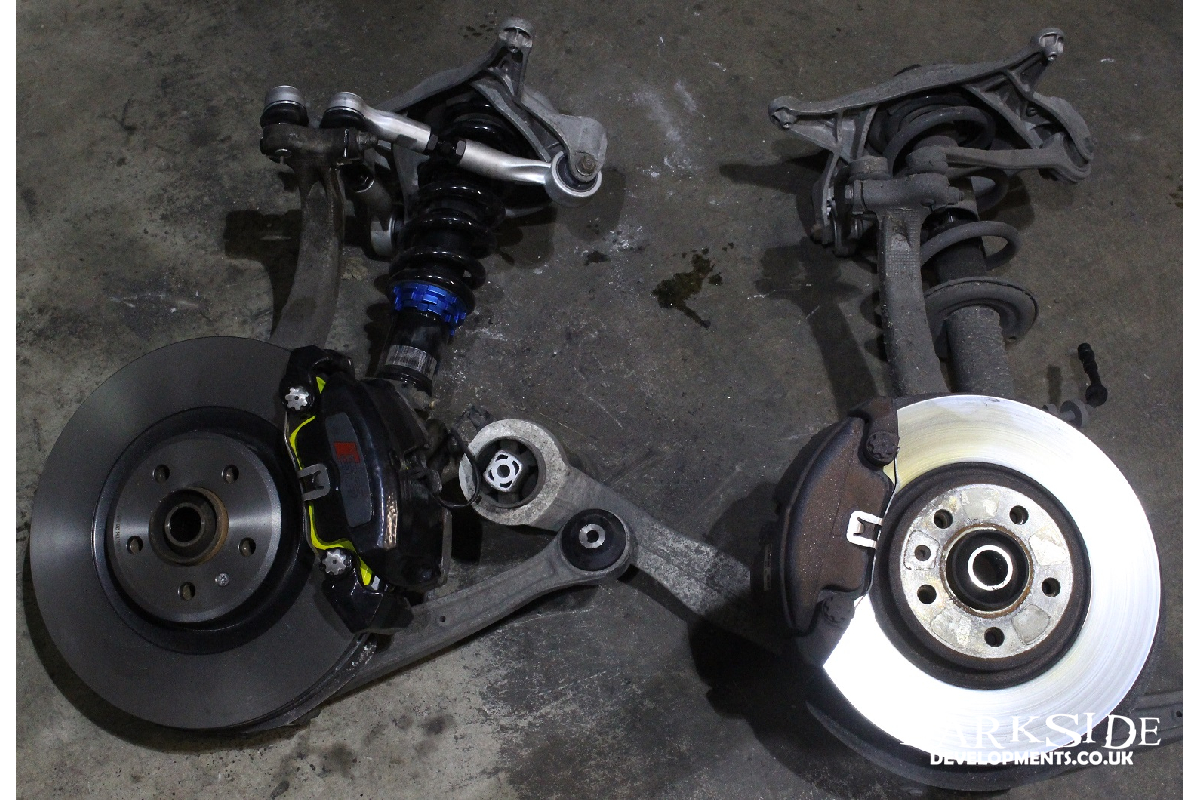
So the first thing we look at is upgraded Suspension. If our cars shock absorbers were in perfect health they would be fine for the first stage of tuning but as they were already leaking, it made sense to change them right away. We went with a Coilover Type with Adjustable Spring Seat, like the BC Racing Coilovers (these are not BCs - its a long story involving a company with terrible service). This allows us to get the ride height perfect, whilst still being able to maintain damper travel.
Probably the most important modification you can ever do are the
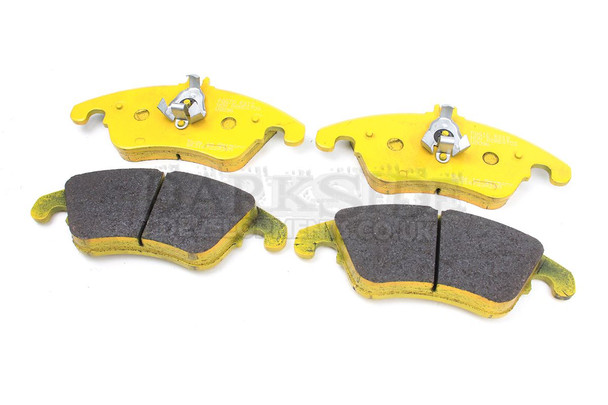
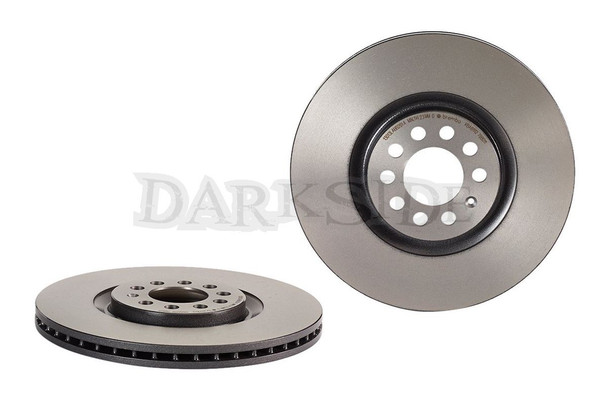
Brakes. In this instance we went for Audi S5 Calipers, which are 345mm Front and 330mm Rear. We are installing Brembo Discs with Pagid RS19 Pads. The Pad choice was based on the RS19s being decent on track and road. If this were a track only car we would have probably gone for RS29s.
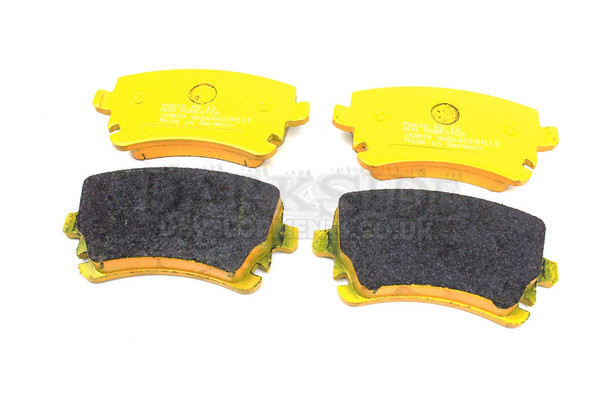
Another point to note is rear pad choice. On most vehicles, especially front wheel drive, the rear brakes do only a small portion of the work. However, if you fit a lower quality pad, there is an increased chance of the pad overheating and going soft, which gives a spongy or long pedal feeling. Not ideal when leaning heavily on the brakes! A Quattro car also has the engine to slow down too so a good set of rears is essential.
In regards to fluid, for over the winter and road use we are sticking to standard DOT4 fluid, but when the weather improves and the car gets on the track, we will be swapping the fluid out for
Motul RBF600
, which has a much higher boiling point. Boiling fluid aerates and gives the same symptoms as a dodgy rear pad. 'Racing' brake fluids absorb water so for general use are best avoided.

As well as increasing the size of the discs and the bite from the pads, we also look to improve pedal feel with the Braided Hoses, as this reduces flex that can occur in the OEM Rubber hoses. Taking this one step further, the TyrolSport Brake Caliper Stiffening Kit removes the rubber bushes on the silders and replaces them with a metal sleeve


A lot of people have commented that we could go bigger - we could. However from experience, the RS3 / RS4 / RS5 discs are bad for warping and the SQ5 and SQ7 items have poor pad and disc choices since they are only fitted to a limited number of models.
If we find that these brakes are inadequate for what we are using the car for, we will look at other options. These should be fine for fast road use, which is what most of our customers will be using their cars for.
All road cars are designed mainly with comfort in mind, even more sporty versions such as the RS5 still have rubber bushes for most of the suspension and drive train mounting points. That is great for nipping to the shops, but when you want confidence in the chassis, things need to get stiffer! On race and track only cars, most bushes are replaced with Rose Joints, which are solid. This is not ideal for a car that will be used on the road as they require frequent checking and replacing, plus all your fillings would come out on the first pot hole you hit.
Luckily there is a step between this. Polyurethane Bushes, in our case from the UK based manufacturer
Powerflex. We will discuss more on their range later in the blog.
Due to the design of the suspension of the B8 Platform, when you lower the vehicle, the Camber and Caster is increased beyond what is ideal for both road and track, which can increase tyre wear as well as reduce handling capabilities. This is why we have chosen some Adjustable Front Upper Arms to allow us to adjust this to the exact specification required.
Then to reduce body roll, we have gone with Eibach Anti-Roll Bars.


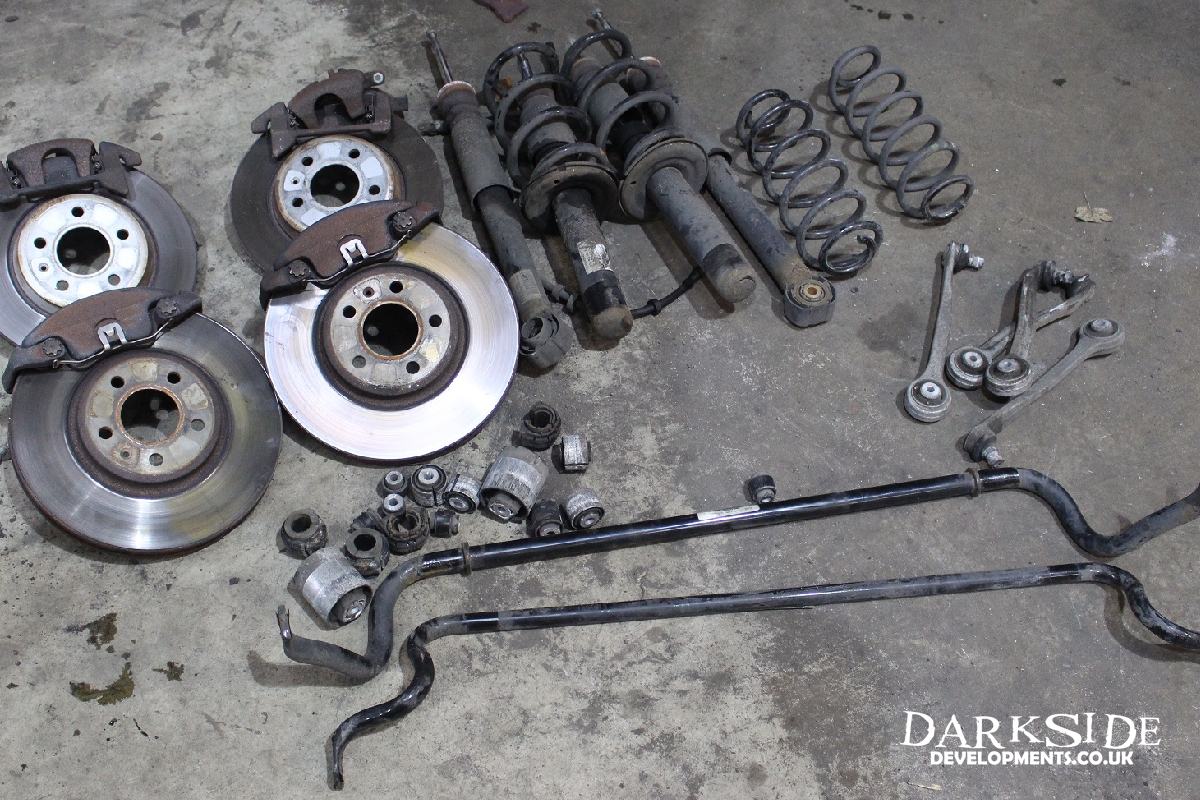
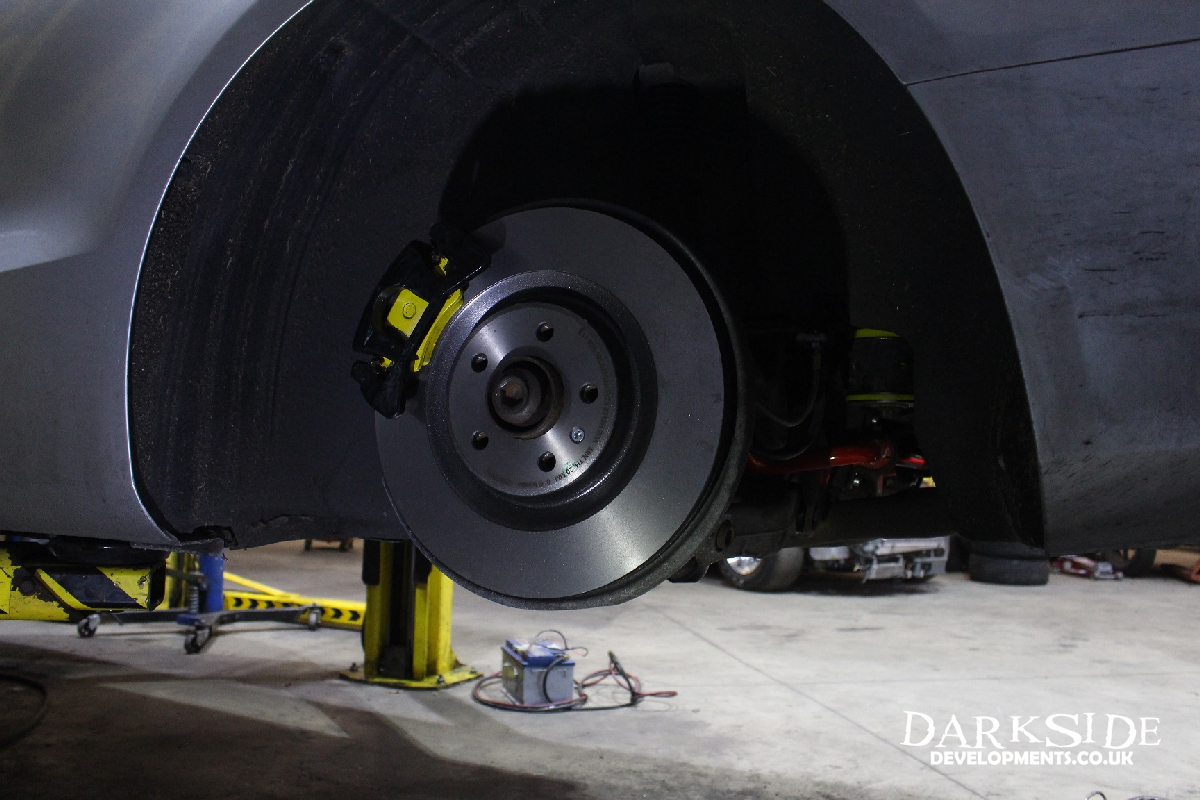
Following on from Part 2 of our Audi A5 vlog, we now have all the chassis and brakes upgrades fitted to the car.
The dampers were all dead, which we suspected with how the car handled (a barge could take corners better) and the fact that every MOT for the last few years mentioned a misting of oil around the shock body.
The rest of the parts are going over to our sister company
SRS Automotive for them to sell on.
Powerflex also can supply a Front Lower Radius Arm To Chassis Bush with Caster Adjustment. We already have Caster adjustment at the top, but this would allow us to get more if required. We will be installing one of those soon.
Its also good to note that this bush can come in 2 different sizes, so its always worth checking with us before ordering to ensure you get the correct size. In some cases the part needs to be physically checked.

We have gone with the PowerFlex Black Series for most bushes. Most road only users would probably want to go for the Purple Road Series instead. On the Subframe to Body and Differential Bushes, we have opted for the Yellow which are slightly softer, and should reduce noise and vibration from the transmission into the cabin.
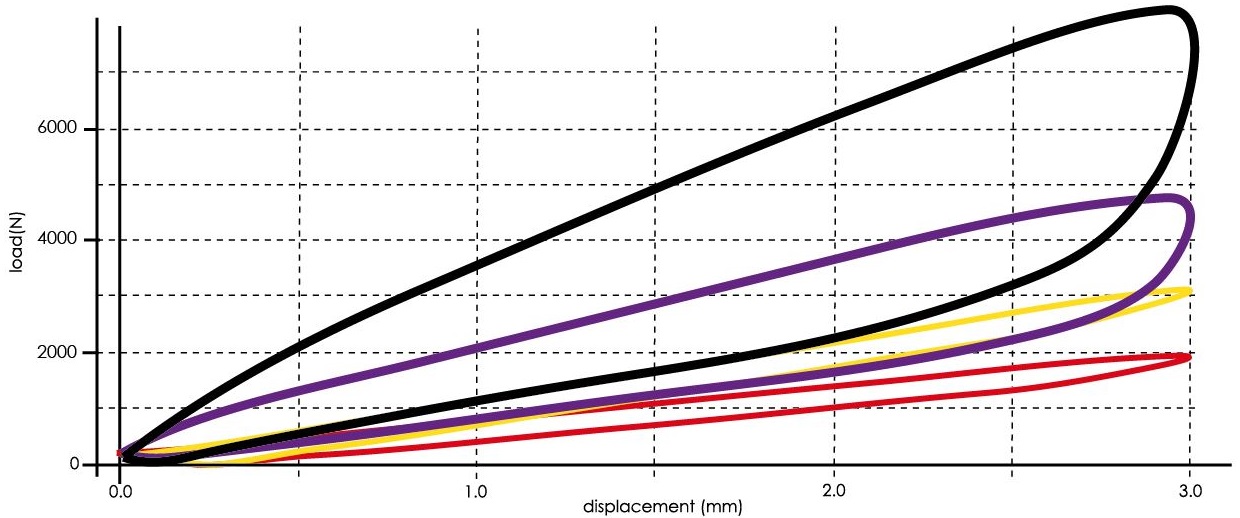
The 4 Powerflex materials are colour coded to make them easily identifiable. Below explains the shore rating (durometer) and their common uses:
Red 65A – Used for Universal exhaust mounts and diesel engine mounts.
Yellow 70A – Mainly used for engine mounts, diff mounts and subframe mounts or areas where the bush needs a lot of movement and absorption.
Purple 80A – The most common material. This is used in most areas of the suspension and provides the right mix between performance and compliance.
Black 95A – The hardest material. This is used for the Black Series range or on normal road vehicles where the vehicles suspension demands require this hardness of material i.e. in areas of high load.
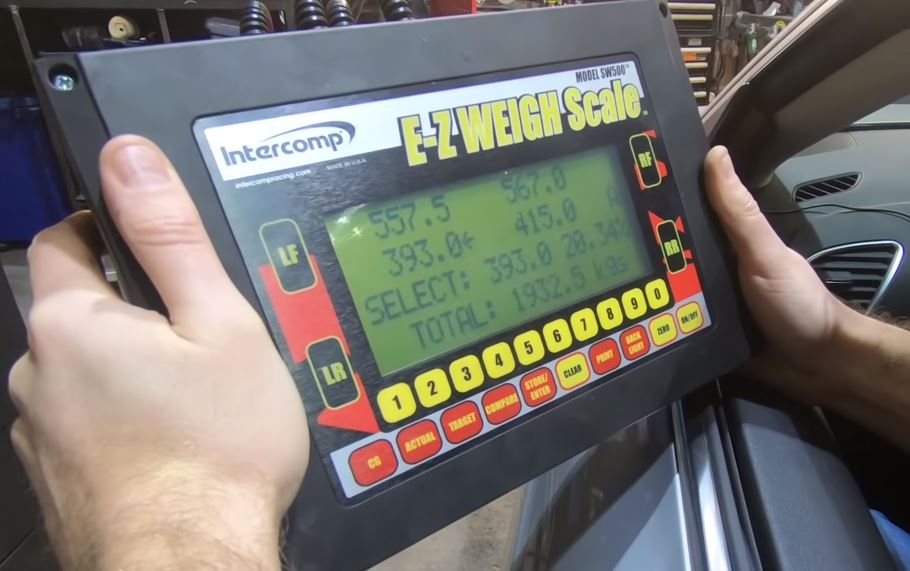
Corner Weights
Once the parts were all fitted, we get on to the corner weights and alignment, which we offer as a service here.
We have a set of InterComp Scales purchased from Race Parts that use to get the corner weights right.
We found that the A5 is HEAVY, like 1769.5Kg with no passengers and half a tank of fuel heavy! Compare that to our Arosa at 820kg and Ibiza Track Car at ~1080Kg, its a big lump of metal so we are going to need some crazy power. Its almost 2 tons (1941Kg) with a Driver and Passenger (not 940kg as Ryan says!) but was pretty even.
If the car was a Drag car like the Arosa we would have it perfectly weighted over the front axle to less than 0.5kg. For a race car there is much debate over perfectly even weights or offset towards the 'inside' wheel depending upon track rotation. Obviously you would compromise left hand turns to increase the grip on right hand bends on a clockwise track. The amount of offset is also debatable, we have 10kg on the A5 but some cars might deliver faster lap times with 50+kg more to the inside wheel. Being RHD on clockwise rotation tracks is good in this respect as usually when the car is level you can see a bias towards the right hand 'inside' that takes a while to dial out, making our Ibiza heavier on the anti-clockwise rotation Rockingham was very difficult.
After corner weights the next thing to check is the ride height, all round was pretty good with both sides equal and a few mm's of rake towards the front to keep the weight over the front wheels during acceleration. This means the front is lower than the rear, softer suspension that squats when power is applied needs more rake to keep front end grip, without the rake a heavy front end car will easily push wide on the exit of bends and in extreme case wont have much straight line traction at the front either.
Alignment
Toe Alignment
Camber Alignment
Caster Alignment
2 - Camber is the angle of the wheel away from straight up, expressed in positive or negative Degrees. Positive camber is usually avoided on most cars, and from the factory our A5 should have roughly 1.2 degrees of Negative Camber. When lowering a car, usually you will end up with more negative camber. This is what we found with our A5 and with a few adjustments of the aftermarket top arms, we dialled it back from over -3 degrees to -1.9. We determined this as a decent 'Road' specification and will likely increase this after some on track testing. To evaluate the Camber angle on track, you have to do a few hot laps and check tyre wear as well as temperatures of the carcass (not the surface). If its hotter on the inside you might have too much camber and vice versa.
One negative of too much camber, besides wearing out or overheating the inside of the tyre, is the amount of tyre contact patch you have in a straight line, such as braking into a corner and accelerating out (since you should be trying to do most of your braking and accelerating in a straight line!). Hence why Dynamic Camber is much more preferable to Static Camber!
3 - Toe is the angle of the wheels in relation to each other. Toe IN would mean the wheels are pointing towards each other, Toe OUT would mean the wheels are pointing away from each other. The factory spec is 0.2 toe IN but we find the safest bet for any new project is to set the wheels parallel (0 Toe or No Toe) and go from there.
On our race cars we have a little toe out, usually around 0.5 degrees all round. Some people prefer more but we like the way the car is fairly neutral but still rotates nicely. If you increase the rear toe out more you can end up with a car that will turn very sharply at the rear, which is good if you are expecting it and not ideal if it catches you out.
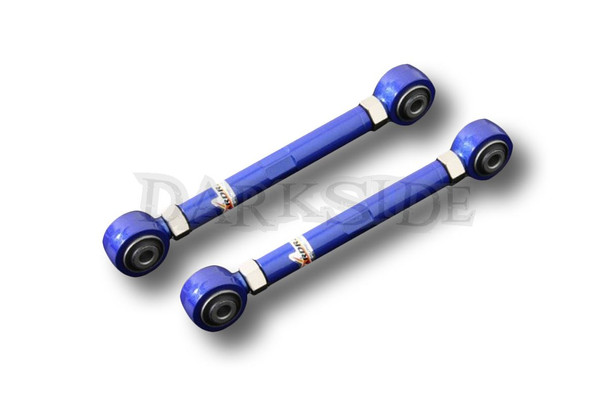
On the B8 platform we have found that lowering the car has meant the rear toe's in by 5 degrees, this will make the car understeer, as the rear wheels will be less likely to rotate. This has not happened by accident, the factory would much prefer a car as it hits a bump to tuck in rather than rotate and oversteer out of control. We didn't realise it would gain so much toe in until we lowered it and measured, so we have ordered some Adjustable Rear Toe Control Arms.
4 - Axle Offset - With our Supertracker laser alignment kit we can also check for Axle Offset, no-one wants their car to be crabbing down the road, our A4 measured perfectly.
Put simply, there is no one size fits all alignment setup for any car. If you follow a few simple rules and carry out solid testing, you can build a car that does exactly what you need reliably and safely without eating tyres any quicker than necessary.
Another subject we can speak about at length is Tyre Pressures, but that is for another day!
We are aware that we have not done EVERYTHING possible to the B8 Chassis to get it handling even better. We have stuck to the affordable and most common modifications. One thing not mentioned in the video that we installed is the
Transmission Insert, a must have for this platform. It reduces the movement in the drivetrain massively, at the expense of a little more vibration in the cabin.

There are a host of Chassis Braces available from various manufacturers. We will be getting in touch with them to see what they can offer for our project and will be sure to update you all.
A big thanks to all the suppliers of the parts, please send them for free next time! For the next instalment we will be test driving the new chassis mods, then moving on to some tuning.
Full vehicle spec list and links to the products we fit throughout the build - http://drksi.de/AudiA5
Lastly, don't forget to subscribe to our YouTube Channel: http://drksi.de/YTSubscribe and give us a big thumbs up!
Recent Posts
-

What is DRVN?
Not Our First Rodeo DRVN might look like the new name on the scene but behind the brand is serious e …20 05 2026 -

Turbocharger Installation Tips
Fitting a new turbocharger may sound simple but it is easy to miss key steps that could result in an …21 04 2026 -

Let’s talk about VW’s 6 Speed Manual Gearboxes
Many of us discuss what a true ‘drivers’ car should be, most say that 3 pedals and driver input via …26 01 2026